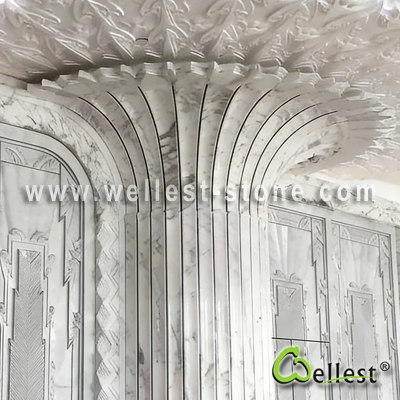
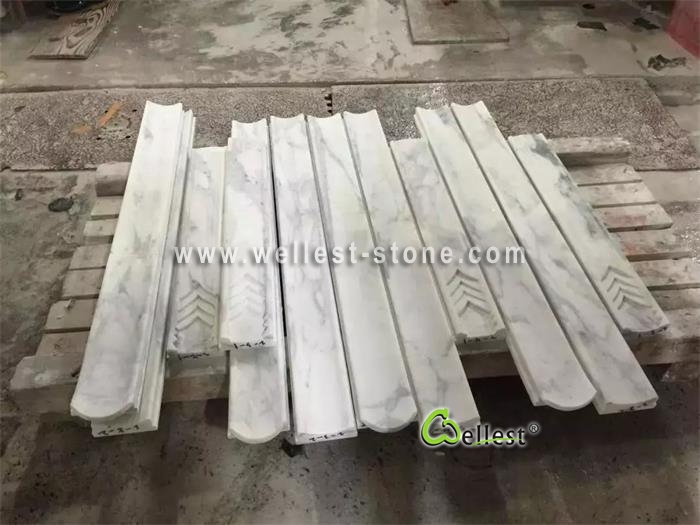
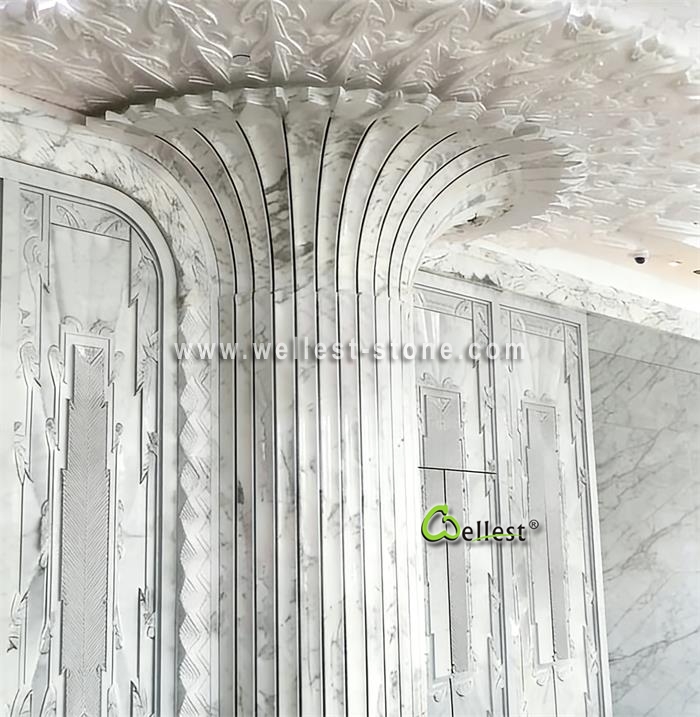
Design: Composed of multiple vertical stone panels, with a 5–8 mm recessed groove left between panels (indicated by black lines in the diagram) to create a "vertical rib" effect and enhance three-dimensional depth.
Individual Panel Width: 150–200 mm (determined by dividing the total column width equally to ensure visual uniformity).
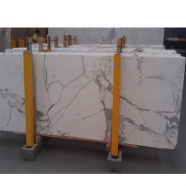
Panel Thickness: 20–25 mm (standard thickness for natural marble, ensuring structural integrity).
Height: Customized according to floor-to-ceiling height; typically installed as full-height panels (2.8–3.2 m) without horizontal joints for a visually seamless appearance.
Groove Dimensions: 3–5 mm deep and 5–8 mm wide; joints are filled using color-matched stone adhesive or metal strips.
Processing Requirements: The side edges of the panels must be chamfered to ensure tight-fitting joints and precise alignment of the stone grain.
(2) Curved Radiating Section at the Top (Key Technical Challenge)
Design: Extending upward from the straight section of the column shaft, each panel radiates outward in a circular arc from a single common center point, transitioning seamlessly into the ceiling structure to create a "fan-like expansion" effect. The center points and radii of all arcs are precisely identical, ensuring that all joints align perfectly along a continuous curved line.
Standard Reference Dimensions (Adjustable Based on Site Conditions)
1. Column Shaft (Based on a Typical Lobby Column)
Total Column Width: 1200–1500 mm
Number of Panels: 8–10 (Individual panel width of approximately 150 mm offers the most visually harmonious appearance)
Panel Thickness: 20 mm
Grooves: 6 mm wide, 4 mm deep
Height: 3000 mm (Full height; no horizontal joints/splicing)
2. Upper Curved Section
Arc Radius (R): 1200 mm
Total Central Angle: 90° (Extending outward from both sides of the column shaft toward the ceiling)
Central Angle per Panel: 90° / 8 = 11.25° (Based on an example of 8 panels)
Arc Length per Panel: (1200 × 11.25 × π) / 180 ≈ 235.6 mm
Panel Width at Upper Edge: ≈ 235.6 mm (Wider than the lower edge due to the expanding arc)
Curved Section Height: 300–500 mm (Adjustable based on ceiling height)
3. Key Quality Control Metrics
Stone Joint Gap: ≤ 0.5 mm; Surface Level Difference: ≤ 0.3 mm
Curvature Deviation: ≤ 1 mm per 1 meter (Ensuring a smooth, continuous overall arc)
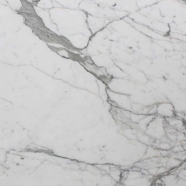
Vein Alignment: Veins on all panels must be straight, continuous, and free of misalignment
Dry-Hanging Substructure (Keel) Verticality: Deviation ≤ 3 mm over the full height
Construction Process and Key Pitfalls to Avoid
1. Standard Construction Process
On-site 1:1 Layout: Snap layout lines for the design contours on walls, floors, and ceilings; determine the precise locations of centers, radii, and individual stone panels.
Detailed Shop Drawings:** Based on the on-site layout dimensions, create detailed fabrication drawings for each individual stone panel (including 3D models).
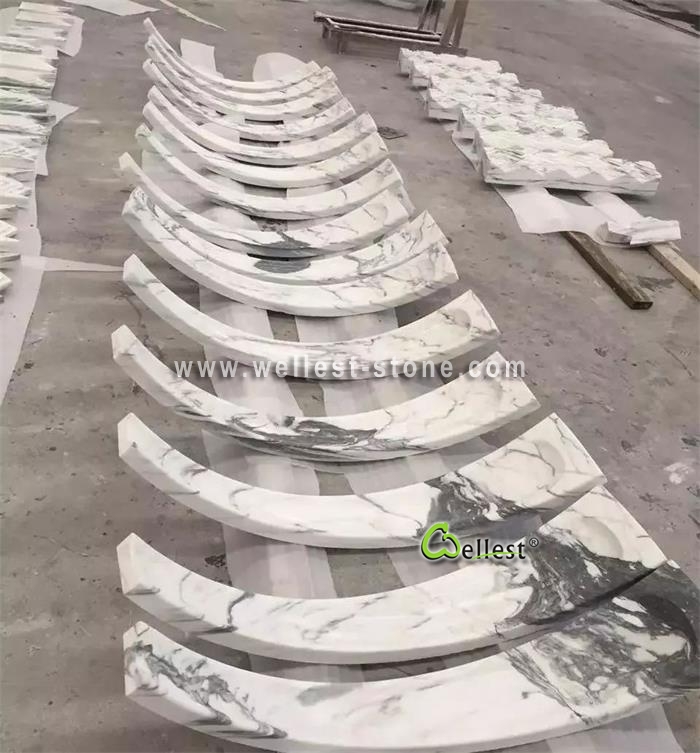
Factory Fabrication and Pre-assembly:** Process the stone using CNC machinery; perform a 1:1 dry-fit pre-assembly at the factory; number each piece once verified as accurate.
Substructure (Framing) Installation:** Weld the steel structural framework; apply anti-rust treatment and perform leveling adjustments.
Stone Dry-Hanging Installation:** Install from the bottom up—starting with the straight sections of the column shaft, followed by the curved sections at the top, and finally the ceiling interface.
Joint Filling and Polishing:** Fill the joints using color-matched stone adhesive; grind and polish the surface to ensure a seamless and aesthetically pleasing finish.
2. Key Pitfalls to Avoid
❌ Incorrect: Skipping the on-site layout and fabricating directly based on drawings → **Result:** Incorrect curvature and misaligned joints.
✅ Correct:Must perform a 1:1 layout on-site and verify all dimensions before proceeding with fabrication.
❌ Incorrect: Using a standard cutting machine to fabricate curved panels → **Result:** Significant curvature deviations, making proper assembly impossible.
✅ Correct:Must** use 5-axis CNC machinery or waterjet cutting to ensure high precision.
❌ Incorrect: Skipping the factory pre-assembly stage → **Result:** Issues are discovered on-site, making rework difficult or impossible.
✅ Correct: Perform a factory pre-assembly, number the panels, and ship them to the site for installation according to their assigned numbers.
❌ Incorrect: Using a wet-set (mortar) installation method → **Result:** Cracking or "hollow drumming" (detachment) caused by the stone's own weight.
✅ Correct: Use the dry-hanging installation method to ensure structural safety and stability.
If you have any project need special column and shape, feel free to contact us.


 Tel:0086-755- 23248150
 Fax:0086-755-23248048
 Email: info@wellest-stone.com
  Whatsapp: 0086 18218369069
  Wechat: 0086 18218369069
 Shenzhen > Shuitou > Guanyang > Hezhou > Hebei > Sichuan